NOTE: Please make sure your substance painter version is up to date or your files will not work! You need to be on version: 7.3.0
If you cannot find the answer to your question in the "how to's" guide below then please DM me on twitter @bubblegumbark, please allow 24 hours for response
Join my Bubblegumbark community discord! Click here
Thank-you for your wonderful support! Special thanks to the following wonderful people in the 3D furry community who without I would not be where I am today!For your amazing 3D knowledge talents and kindness
kaideart
Skip4D
RitoBandito
Crownedcorvid
QuaggyCFor testing, modeling, and retesting every single thing without question
Bearlyfeline...and of course to everyone who has retweeted, liked shared and purchased my bases! THANK-YOU!!!
How to's ...
Welcome to the "How to's" section where you can find the information you need to install my bases. If you have any further questions you can contact me via the contact link on the home page!
VRChat
Substance Painter
YOU MUST HAVE UPDATED TO ADOBE SUBSTANCE PAINTER VERSION: 7.3.0 OR NEWER TO USE THE SUBSTANCE FILES.
Importing
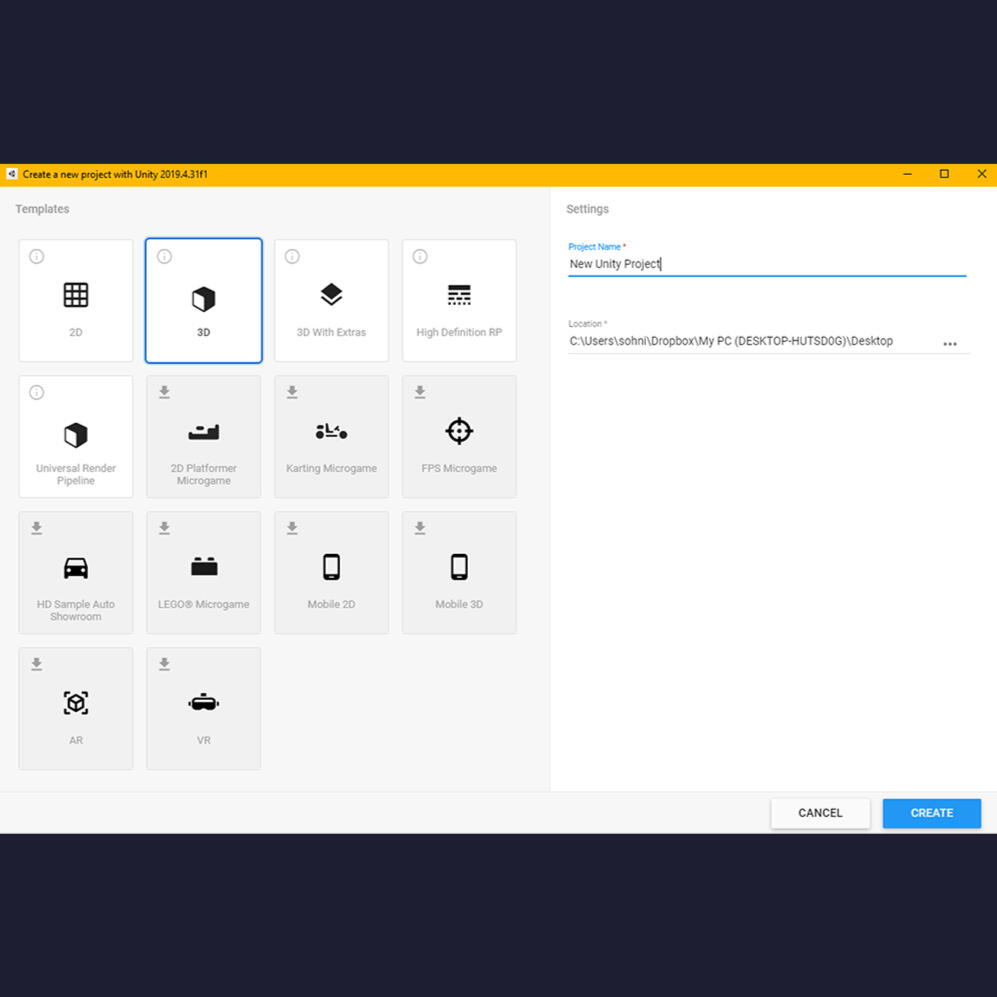
Now you have downloaded all of the above it's time to Import!1) Open UNITY HUB >> Click NEW >> Select "3D template" and hit create. Name the project whatever you want!
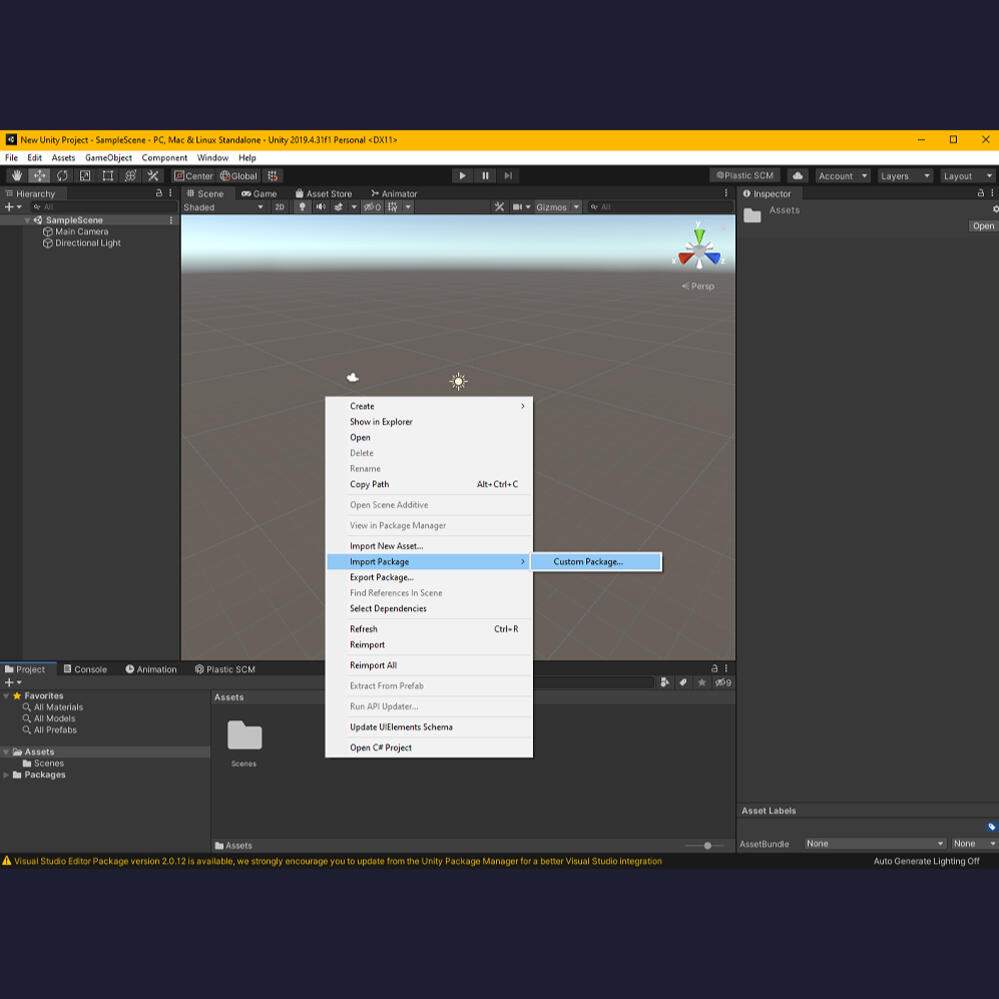
2) Right click the "Assets tab" (Bottom centre) and select Import package >> Custom Package then select the unity package Dynamic bones OR import Dynamic bones from the asset store (Top centre of screen)3) Right click Assets tab select import package >> custom package
Then select unity package: VRCSDK3-AVATAR-2021.11.08.14.28_Public4) Right click Assets tab select import package >> custom package.
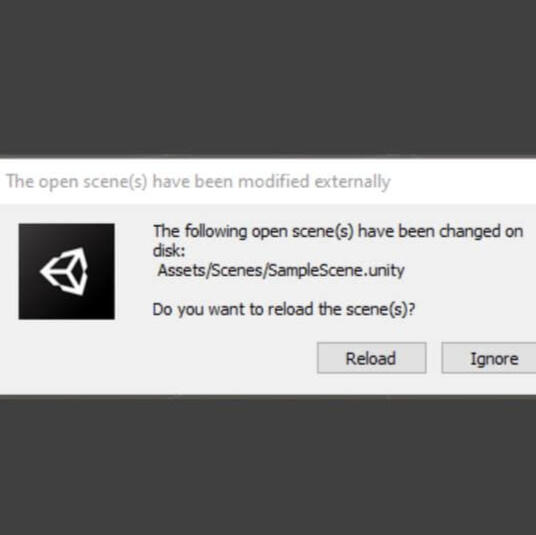
Then select: BGB_CanineBaseNote: If a pop up appears asking you to reload the sample scene, hit RELOAD
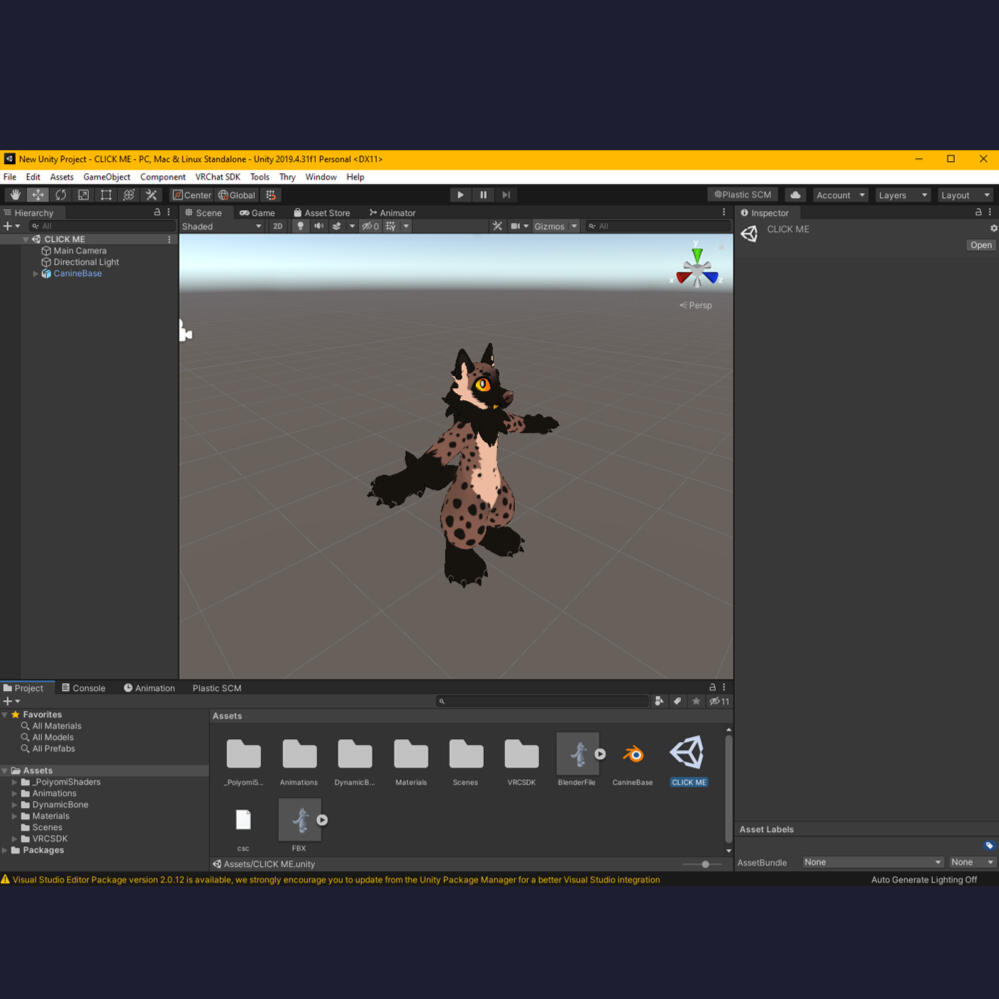
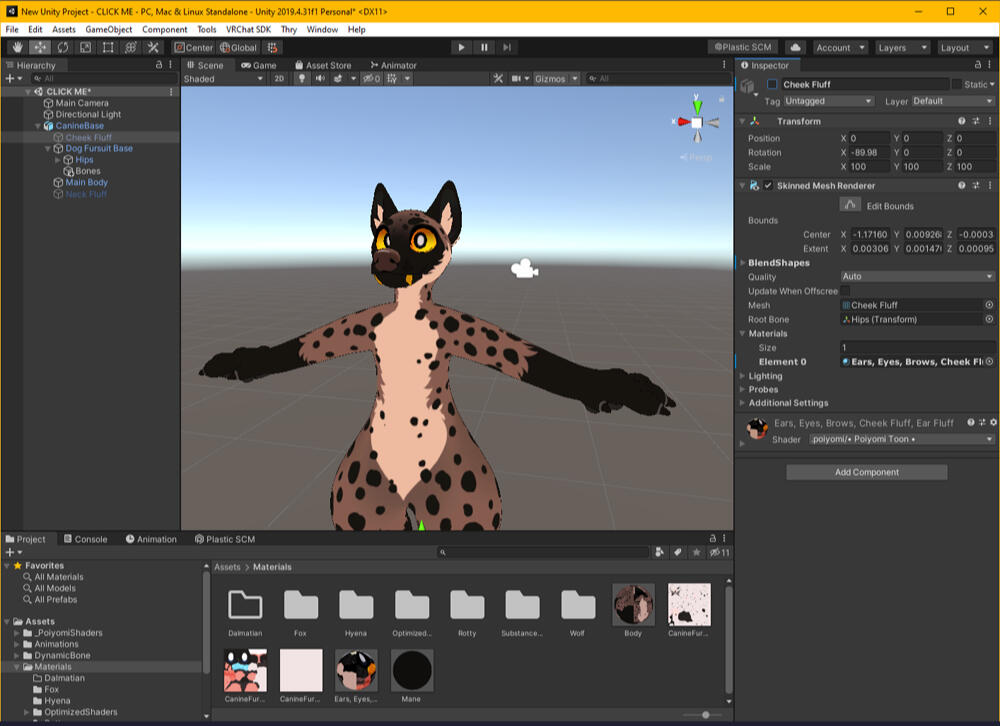
5) Double click on the unity logo in the assets tab (Bottom middle) labled "CLICK ME". If you've followed along with us so far your Unity project should look like the screen below!Note: If the model is zoomed out click on the model ONCE and click [ F ] to focus!
If you're ready to customise your model or change the base colours, click below to get started on our next "How to's" guide" !
OR if you're model is ready to go and meet everyone in VRchat, Click the button below to head over to our upload to VRChat "How to's" guide !
Beetlef: The "How to's" guides cover basic set up/customisation and uploading of our base however you will require a basic knowledge of Unity and Substance painter navigation. I will be unable to answer questions regarding the programs featured in these guides. Though I have included a link to some supplementary tutorial videos from external sources if you need a little extra guidance. I cannot be held responsible for the content in these videos they are merely tutorials that helped me on my own journeys into creating 3D avatars! Thank-you <3
Beginners Unity , Beginners Substance Painter
Customising
Note: For creating your custom textures we recommend using Adobe substance painter. The tutorial below covers uploading completed custom textures or preset textures into Unity and editing Blendshapes.
Importing custom textures in Unity
Set upIf you have custom textures it's now time to import them into Unity. To do this drag and drop the files into the materials folder in the Assets tab.For the BGB Canine base you should have the three textures files in PNG format. Or two if you are not using neck Fluff!To add your textures, click on the Material sphere in the materials folder in the Assets tab. It should look like the image below!Note If the shader says "unlock shader" like in the image below just click unlock shader to begin adding your custom textures! We do not recommend changing shaders as our Base's "follow me eyes" will not work correctly!
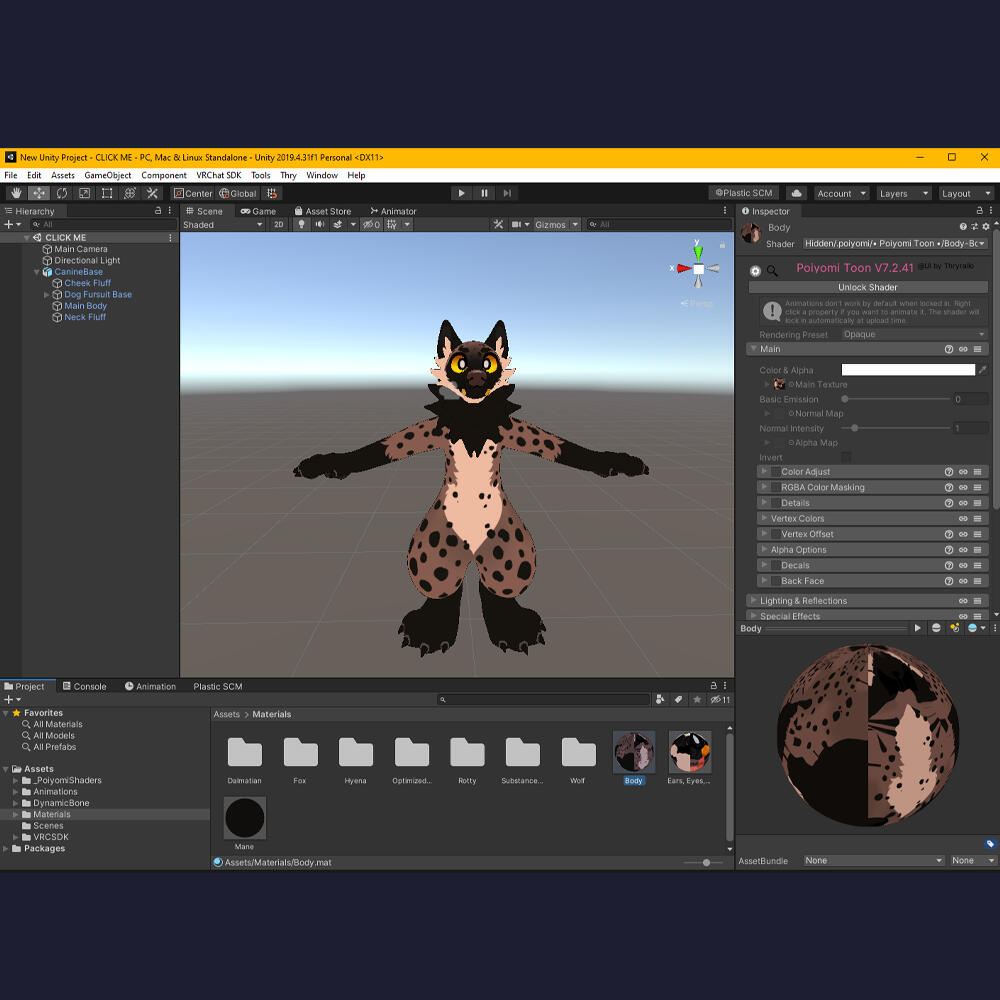
Once you have your custom textures imported into your project they will be next to the materials in the assets panel ( Your materials are the Sphere icons labeled Body, ears..., Mane)Now, Select the first Material you would like to customize by clicking on the sphere (Eg - Body) then in the shaders tab on the right-hand side click the tab that says "Main" to open a drop-down menu.Drag and drop your texture (the PNG file you imported) onto the small square labeled "Main texture" underneath Color & Alpha.
Note: Make sure that the colour & Alpha colour remains whiteWhen you are done with a material click the "Lock-in optimized shader" button found at the top of the shader menu (Top right hand side)Repeat each step for each Material you would like to customize(See video below)
Blendshapes
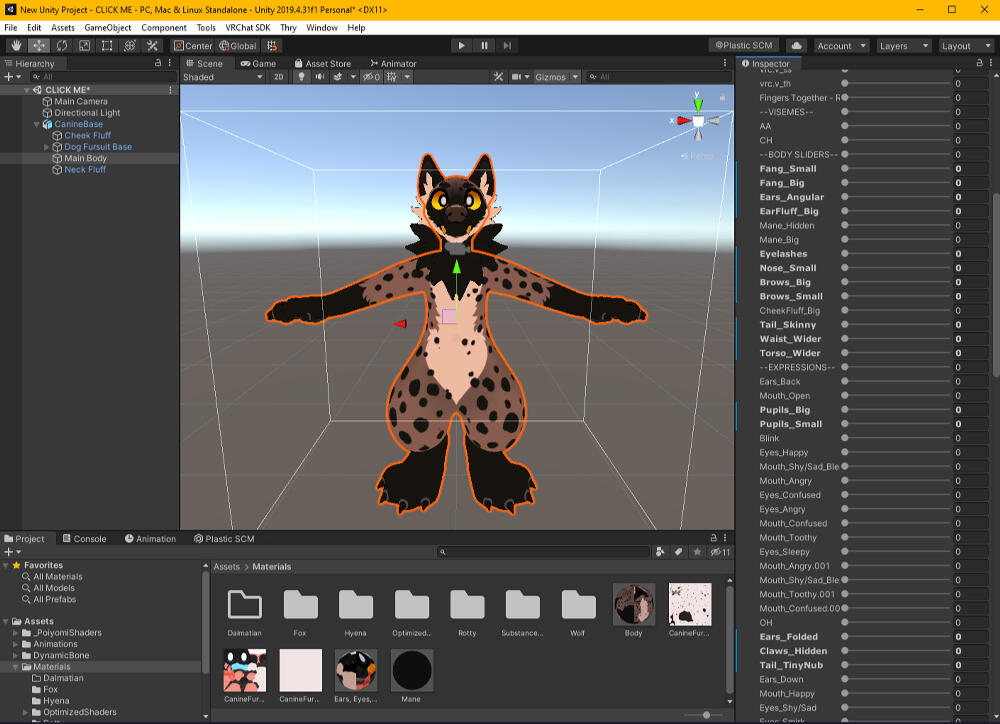
Blendshapes are what let you customize the shape of your Avatar. For the BGB base, this means Ears, teeth, body, brows, nose, and tails, and fluff levels!To access your Blend shapes click on the object labeled main body on the left-hand side of the screen under the tab "Canine Base"On the right hand side of the screen in your "inspector" open the drop-down menu called Skinned mesh renderer and then open the blendshapes menu found within.Now you will see the blendshape sliders which you can adjust by dragging the circles next to each Blendshape name that is bolded in the image below. The names will not be bolded in your Unity file so please refer back to this image when using blendshapes!Note: You can only edit certain Blendshapes that are BOLDED in the image below, if you edit anything else it will break the model!!!!Try not to mix ear or tail types as this will also cause issues with the models.If you want to edit cheek fluff or neck fluff blendshapes instead of clicking on the MAIN BODY object click CHEEK FLUFF or NECK FLUFF on the left-hand side of the screen and follow the same steps as above!
If you use the Nub tail slider in your blend shapes, you will need to uncheck the dynamic bone linked to TAIL.001 please refer to the image below on how to locate the tab. if you do not uncheck this your tail will explode in-game!

If you wish to remove the cheek or neck fluff click on the object cheek fluff or neck fluff located on the top left-hand side of the screen.Then uncheck the object on the right-hand side of the screen at the top to remove it. When you have successfully removed the object you wish to remove the object name should be greyed out and it will not visible on your model!
Now you're model is ready to go and meet everyone in VRchat, Click the button below to head over to our upload to VRChat "How to's" guide !